Evernote便利です。画像とテキストをまとめて保存できて、リンクを貼れるのでとても便利です。以前はMhtmlを使っていましたが最近はすっかりEvernoteです。いくら便利でも限界はあります。どうしても自動化や手の届かない処理はプログラムで書きたくなります。そこでプログラムからEvernoteにアクセス方法を調べて一括管理することにしました。
EvernoteAPIを使ってRubyでノートを扱う方法
Evernoteをプログラムから扱うには、次のようにします。
- Sandbox(砂場)をつかってプログラムを実験する
- アカウントを作る
- アレコレ実験する
- 正式版のEvernoteのノートを扱う。
Sandboxで実験はしておいたほうがいいでしょう。うっかり消しちゃうとか制限いっぱいまでアップしちゃうといったトラブルを回避できる。
EvernoteAPIについて知っておくべきこと
Sandboxの使い方。
evernote sandbox test serverにアクセスして、アカウントを作ります。
次に、APIキーを発行してもらいます。
ウェブサービスAPI にアクセスしてAPIキーを発行します。
アクセストークンの発行
gemの準備ができたら、次はアクセストークンを作ります。アカウントとAPIキーを関連付けます。
access_toke.rb
#!/usr/bin/env ruby
#evernote のアクセストークンを取得する
require "rubygems"
require 'evernote'

user_store_url = "https://sandbox.evernote.com/edam/user"

config = {
            :username => "takuya****_sandbox",
            :password => "******",
            :consumer_key    => "takuya_1st-*****",
            :consumer_secret => "******",
         }

user_store = Evernote::UserStore.new(user_store_url, config)

auth_result = user_store.authenticate
user = auth_result.user
auth_token = auth_result.authenticationToken
puts "Authentication was successful for #{user.username}"
puts "Authentication token = #{auth_token}"
実行
実行するとTOKEが出てきます。
takuya@air:~/Desktop$ ruby access_token.rb
Authentication was successful for takuya_1st_sandbox
Authentication token = S=s1:U=***:E=***:C=1**:P=37:A=takuya_****:H=********
このアクセストークンを使ってEvernoteのアカウントにアクセスできるようになります。アクセス関連のエラーがでたら、このプログラムでTOKENを再発行し、またやり直せばいいと思います。
Evernoteにノートを追加する。
デフォルトのノートブックにノートを追加する。
作ったアクセストークンを使って、アカウントにアクセスできるようなったので、ノートを追加してみます。
require "rubygems"
require 'evernote'
#先程取得したToken
auth_token = "S=s1:U=****:E=*******:C=*******:P=**:A=takuya_****:H=***"

#ノートのエンドポイントのURL
note_store_url = "http://sandbox.evernote.com/edam/note/s1"
# 正しくは以下のような形式じゃないとダメらしいけど、決め打ちでOKだった。
# note_store_url = "http://sandbox.evernote.com/edam/note/#{user.shardId}"

note_store = Evernote::NoteStore.new(note_store_url)
notebooks = note_store.listNotebooks(auth_token)
default_notebook = notebooks[0]

#ノートを作る
note = Evernote::EDAM::Type::Note.new()
note.title = "hello Evernote world"                                          ## タイトル
content = "<?xml version=\"1.0\" encoding=\"UTF-8\"?>" +      ## 内容 ENML形式
  "<!DOCTYPE en-note SYSTEM \"http://xml.evernote.com/pub/enml.dtd\">" +
  "<en-note>" +
  "my first note from ruby " +
  "</en-note>"
note.content = content

begin
createdNote = note_store.createNote(auth_token, note) #ノートを保存
rescue => e
  puts e
  puts "ENMLシンタックスエラー" if  e.errorCode == Evernote::EDAM::Error::EDAMErrorCode::ENML_VALIDATION
end
ノートの確認
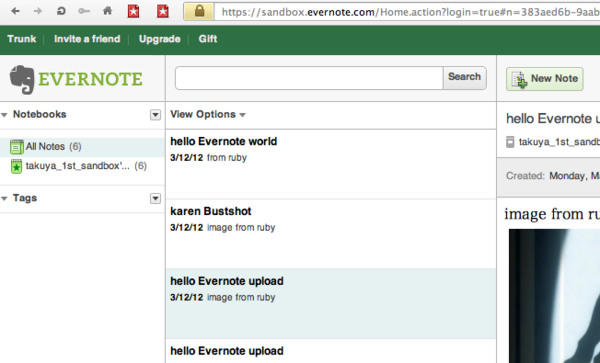
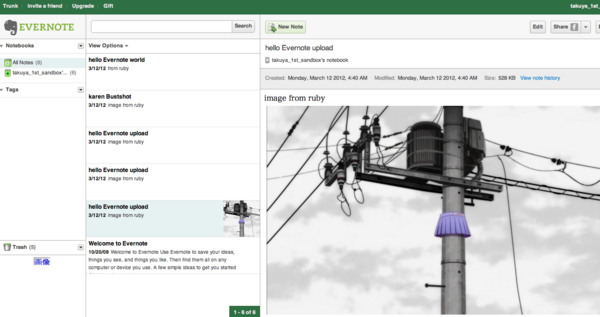
サンドボックス テストページにログインして、確認してみるのが一番早い
次に写真のアップロード
写真は添付ファイルとしてアップロードします。
Evernoteは画像が貼り込めるから便利なんですよね。画像を扱えないと魅力が半減です。まず画像の扱い方を覚えましょうか
upload.rb
画像を添付するスクリプト
require "rubygems"
require 'evernote'
require "mime/types"
require 'base64'
auth_token = "S=s1:U=****:E=*******:C=*******:P=**:A=takuya_****:H=***"

#添付したい写真を読み込んで、MD5でハッシュキーを作る。
filename = "vlcsnap-00007.png"
mime_type = MIME::Types.type_for(filename).to_s
image = File.open(filename, "rb") { |io| io.read }
hashFunc = Digest::MD5.new
hashHex = hashFunc.hexdigest(image)

#添付ファイルのメタデータ形式を作る。
data = Evernote::EDAM::Type::Data.new()
data.size = image.size
data.bodyHash = hashHex
data.body = image

#dataと併せて添付ファイル形式を作る
resource = Evernote::EDAM::Type::Resource.new()
resource.mime = "image/png"
resource.data = data
resource.attributes = Evernote::EDAM::Type::ResourceAttributes.new()
resource.attributes.fileName = filename

#ノートブックを取得して
note_store_url = "http://sandbox.evernote.com/edam/note/s1"
note_store = Evernote::NoteStore.new(note_store_url)
notebooks = note_store.listNotebooks(auth_token)
default_notebook = notebooks[0]

#ノートを新規作成。
note = Evernote::EDAM::Type::Note.new()
note.title = "hello Evernote upload"
content = "<?xml version=\"1.0\" encoding=\"UTF-8\"?>" +
  "<!DOCTYPE en-note SYSTEM \"http://xml.evernote.com/pub/enml.dtd\">" +
  "<en-note>" +
  "image from ruby " +
   '<en-media type="' + mime_type +'" hash="' + hashHex + '"/>' +
  "</en-note>"

note.content = content
note.resources = [ resource ] #リソースを貼付け
#ノートをサーバーへ
createdNote = note_store.createNote(auth_token,  note)

puts :end
ノートの中身を取得するには
ここまでできたら、あとはAPIの叩き方をパターンで覚えるだけです。どんどん行きましょう
#ノートの中身を取る
id = note_list.notes.last.guid #ノートのIDを取得して
content = note_store.getNoteContent auth_token, id #取得
ノートには guid という一意な識別子が付与されていて、それを指定しノートの中身を取り出します。
ノートの一覧を取得する。
ではノートの一覧も取得してみましょう
ノートの一覧を表示するには、ノートブックの中に検索条件を指定して、取り出します。
##検索条件を作る。
filter = Evernote::EDAM::NoteStore::NoteFilter.new
#デフォルトノートブック中のノート一覧を探す。
    #ノートブックのIDを取得し検索条件に入れる。
filter.notebookGuid = default_notebook.guid
#取得する最大数を設定
limit = 1000
#何件目から取得するか
offset  =0
note_list = note_store.findNotes auth_token, filter, offset, limit
note_list #http://www.evernote.com/about/developer/api/ref/NoteStore.html#Struct_NoteList
#表示してみる
note_list.notes.each{|e| puts [e.title,e.created,e.content].inspect} #ノートのタイトルやメタデータは取れるよ。でも中身はないよ!
limit や offset があるのは、EvernoteがフロントエンドのデータストレージにSQLiteを使っていることから、SQLへの呼び出しだと推測できる。
ノートに付けられたタグ一覧を取得する
ノートにつけたタグも、ノートのguidを指定して、そこから関連付けて取り出します。
#ノートにつけた[タグ一覧]を取り出す。
id = note_list.notes.last.guid
labeled_tags = note_store.getNoteTagNames auth_token, id
つまりguidがすべてのキーになっているのですね。
ノートの属性情報にアクセスする。
ノートには「作成者」「緯度」「経度」「URL」などの拡張属性情報を持つことが出来ます。それらにアクセスしてみます。
#ノートにつけた属性情報一覧を取り出す。
# http://www.evernote.com/about/developer/api/ref/Types.html#Struct_NoteAttributes
attrs = note_list.notes.last.attributes
attrs.latitude #緯度
attrs.longitude #経度
attrs.author
attrs.sourceApplication
attrs.sourceURL
attrs.source

#ノートにつけた属性情報を更新する。
current = note_list.notes.last
attrs =current.attributes
attrs.author = "takuya"
attrs.placename = "takuya"
current.attributes = attrs
note_store.updateNote(auth_token,current)
ThriftのAPIや使えるメソッドは何処で調べるか?
Evernote API: All declarationsに細かく載っています。
大体は上記のサンプルコードを見ればわかると思いますが、名前空間は次のような感じになっていました。
| Thriftの定義 | evernoteパッケージの名前空間 |
|---|---|
| Types Note | Evernote::EDAM::Type::Note |
| Types Resource | Evernote::EDAM::Type::Resource |
| Module NoteStore | Evernote::NoteStore |
| Module NoteStore Types NoteFilter | Evernote::EDAM::NoteStore::NoteFilter |
| Module UserStore | Evernote::UserStore |
ENMLとは?
DTDで定義されたEvernote独自のHTMLサブセット。
基本構造は次のような感じになっていました
<?xml version="1.0" encoding="UTF-8"?>
  <!DOCTYPE en-note SYSTEM \"http://xml.evernote.com/pub/enml.dtd\">" +
  <en-note>
   this is a text . hello from ruby
   images from ruby
  <en-media type="image/png" hash="bdeasdf1234fa19"/>
  </en-note>
テキストと装飾以外の添付リンクファイルは、en-mediaタグに納めて、キーを元に resourcesに登録します。
ENMLで使えるタグ
ENMLのマニュアルによると、以下のタグが使えます。
A, ABBR, ACRONYM, ADDRESS, AREA, B, BDO, BIG, BLOCKQUOTE, BR, CAPTION, CENTER, CITE, CODE, COL, COLGROUP, DD, DEL, DFN, DIV, DL, DT, EM, FONT, H1, H2, H3, H4, H5, H6, HR, I, IMG, INS, KBD, LI, MAP, OL, P PRE, Q, S, SAMP, SMALL, SPAN, STRIKE, STRONG, SUB, SUP, TABLE, TBODY, TD, TFOOT, TH, THEAD, TITLE, TR, TT, U, UL, VAR, XMP
Cloud API - Evernote Developers
使えるリンクは次のリンクが使える
http, https, file
使えるメタ属性
The EN-NOTE element supports the following optional attributes:
· bgcolor – background color of the note
· text – text color
· style, title, lang, xml:lang, dir – optional attributes with the same semantics as the corresponding XHTML standard attributes.
styleやタイトルは
onclickなどは?on***などは保存できません。ENMLをアップロードするときにシンタックスエラーで落ちます。
img src=data は出来るの?
試したらできた。でも検索条件として使えなくなるので諸刃の刃。
Evernoteをプログラムから使うと・・・活用アイディア
たくさんの写真をまとめてアップロードしてまとめてダウンロードしたり、ファイルサイズがオーバーしそうなPDFはJPEGに分割して、複数ノートに自動分割ができそうですね。
また、WordpressのようなCMSのバックエンドにも使えそうです。
履歴のアクセスを使えば、バージョンを見ることができます。
タスク関連の属性を使えば、期日を設定したAPIアクセスができます。
なんというファイルシステムの拡張。
2012-07-04追記
本番環境は
Sandbox: https://sandbox.evernote.com/
http://dev.evernote.com/documentation/cloud/chapters/Testing.php
Production: https://www.evernote.com/
本番環境にアクセスするとエラー
Thrift::ProtocolException: No version identifier, old protocol client?
It happened to me. Make sure the sandbox URL is OK:
"https://sandbox.evernote.com/edam/user"
Do not replace the 'user' string in the URL path with your username.
'read_message_begin': No version identifier, old protocol client? (Thrift::ProtocolException) · Issue #9 · cgs/evernote · GitHub
ということらしい。これは endpoint のURLが間違っているときに起こるそうだ。ちなみに私はwwwwと、wwwが一つ多かった。猛反省

