MacのXCODEがgcc からllvmに変更されているので、ffmpegのインストールでエラーになる。
llvmだとエラーになる。
GoogleAppsアカウントで、ichatを使う。
google talksが無いのでichat を使う。Google Appsアカウントでも設定できる。
CygwinをつかえばWindowsでも簡単にCronを使うことが出来ます。いままでどうしてやらなかったんだ。便利すぎて大活躍。なぜ避けてきたんだ。そう思うくらい後悔したのです。
インストール不要。Cygwin入ってたら不要。
takuya@amdE350:~$ apt-cyg install cron
Working directory is /setup
Mirror is ftp://ftp.jaist.ac.jp/pub/cygwin/
Package cron is already installed, skipping
takuya@amdE350:~$
とりあえずやってみよう。
takuya@amdE350:~$ cron-config
起動すると以下の質問が聞かれる。
・Cronはサービスとして実行するのか
・Cronはどのユーザーで動かすか?
・通常のユーザー(つまり自分)なのか、特権ユーザなのか
・特権ユーザーは既存の物を使うのか、新規作成するか
僕はSSH用に作った特権ユーザーを使い回したのでそれでいい。
再起動してみてもちゃんと動いているのが確認できる。

というわけで設定すれば、これで完了。
takuya@amdE350:~$ crontab -e
takuya@amdE350:~$ cron-config                                                             ##インストールコマンド
Do you want to install the cron daemon as a service? (yes/no) yes              #サービスとして使うか? YES
Enter the value of CYGWIN for the daemon: [ ]

You must decide under what account the cron daemon will run.
If you are the only user on this machine, the daemon can run as yourself.
   This gives access to all network drives but only allows you as user.
To run multiple users, cron must change user context without knowing
  the passwords. There are three methods to do that, as explained in
  http://cygwin.com/cygwin-ug-net/ntsec.html#ntsec-nopasswd1
If all the cron users have executed "passwd -R" (see man passwd),
  which provides access to network drives, or if you are using the
  cyglsa package, then cron should run under the local system account.
Otherwise you need to have or to create a privileged account.
  This script will help you do so.
Do you want the cron daemon to run as yourself? (yes/no) no                     #サービスは一般ユーザーTakuya で動かすか? No

Were the passwords of all cron users saved with "passwd -R", or
are you using the cyglsa package ? (yes/no) no

Attempting to find or create a privileged user.
The following accounts were found: 'cyg_server' .
This script plans to use the name cyg_server for the new user,
which will only be able to run as a service.
Do you want to use another name (not an interactive account)? (yes/no) yes  # cygserver ユーザーあるけど、これつかう? yes

Please enter the password for user 'cyg_server':                                           # cygserver のパスワードちょうだい
Reenter:
Running cron_diagnose ...
WARNING: Your computer does not appear to have a cron table for takuya.
Please generate a cron table for takuya using 'crontab -e'                              # インストール終了。あとはcontab -e で

... no problem found.
ユーザーcygserverの追加を聞かれる。作っちゃうのが楽。SSHサーバーを入れてるときは、すでに作られているので、それを再利用する。
「\(バックスラッシュ)」を挿入してみたんですが それでは効果がないようで・・・。
で、少し調べてみたら解決策を発見。
「 シングルクォーテーション を エスケープ するには、 シングルクォーテーション を2つ重ねる」 = 「''」とのこと。
http://www.android-navi.com/archives/android_1/sqlite/
つまり、
SQLiteでシングルクォートのエスケープはバックスラッシュ(¥マーク)でなく、二つ重ねるそうです
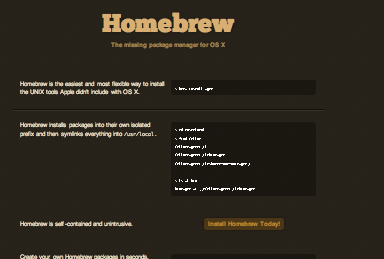
Homebrewを使っている。MySQLが入らなくて困ったので、改めてまとめ直す。

Homebrewとは、Macportsに取って代わりそうな、Macでのパッケージインストーラ
ruby -e "$(curl -fsS http://gist.github.com/raw/323731/install_homebrew.rb)”
| 用語 | 本来の意味 | makeのアナロジー |
|---|---|---|
| Brew | ビール醸造する | make する |
| HomeBrew | 自家醸造 | つまり、自分でビルドする意味 |
| Celler | ビール貯蔵庫 | つまり、インストール先 |
| Keg | タル、熟成用 | つまり、makeの材料 |
| Formula | 調理法 | つまりビルド手順が書かれたスクリプト |
| Pouring | ジョッキに注ぐ | つまり、Macに注ぐ(イント) |
自分でパッケージをビルドして使うってのを、アナロジーで、ビールを自家醸造して、保存して飲むってこと。で表現している。
手順(調理法formula)通りにパッケージをビルド(醸造brew)して保存(/usr/local/cellerに格納)して、使う(/usr/loca/binにリンク)ってことです。
とりあえずこれだけ覚えておけば使える。
ruby -e "$(curl -fsS http://gist.github.com/raw/323731/install_homebrew.rb)” # homebrewインストール
brew search mysql
brew install mysql #mysql をインストール
brew unlink mysql # mysqlを一時的に無効にする。
brew link mysql # mysql を有効にする。
brew update   #  formula を更新
brew upgrade  #  更新があるパッケージを再ビルドする
Brewでつかうためのビルド設定を見る。
takuya@air:~$ brew --config
HOMEBREW_VERSION: 0.8
HEAD: c9eca803d676961ead136b07ab145cc1e826b314
HOMEBREW_PREFIX: /usr/local
HOMEBREW_CELLAR: /usr/local/Cellar
HOMEBREW_REPOSITORY: /usr/local
HOMEBREW_LIBRARY_PATH: /usr/local/Library/Homebrew
Hardware: quad-core 64-bit sandybridge
OS X: 10.7.2
Kernel Architecture: x86_64
Ruby: 1.8.7-249
/usr/bin/ruby => /System/Library/Frameworks/Ruby.framework/Versions/1.8/usr/bin/ruby
Xcode: 4.2
GCC-4.0: N/A
GCC-4.2: build 5666
LLVM: build 2336
Clang: 3.0-211.1
MacPorts or Fink? false
X11 installed? true
brew install wget
をはじめ、必要な使い方は本家の最初に書いてあるよ。
$ cd /usr/local
$ find Cellar
Cellar/wget/1.12
Cellar/wget/1.12/bin/wget
Cellar/wget/1.12/share/man/man1/wget.1
インストールの時にリンク
$ ls -l bin
bin/wget -> ../Cellar/wget/1.12/bin/wget
それぞれ保存される。
brew create http://foo.com/bar-1.0.tgzCreated /usr/local/Library/Formula/foo.rb
brew edit wget
require 'formula'
class Wget < Formula
  homepage 'http://www.gnu.org/wget/'
  url 'http://ftp.gnu.org/wget-1.12.tar.gz'
  md5 '308a5476fc096a8a525d07279a6f6aa3'

  def install
    system "./configure --prefix=#{prefix}"
    system 'make install'
  end
end
Formula を自作するなど、詳しい使い方が書いてある。
brewコマンドの使い方。まとめ
Homebrewの使い方一覧Command Consequence
brew install foo fooをインストール
http://tech.caph.jp/2011/04/06/homebrewの導入と使い方/
brew install --HEAD foo fooのHEADバージョンをインストール
brew install --force --HEAD foo fooの新しいHEADバージョンをインストール
brew search インストール可能なすべてのformulaを表示
brew search foo インストール可能なformulaからfooを検索
brew search /foo/ 正規表現fooを検索
brew list インストール済みのformulaeを表示
brew list foo fooのインストールしたファイルを表示
brew info --github foo foo formulaのGithub履歴ページをブラウザで表示
brew info インストール済みのHomebrewパッケージのサマリーを表示
brew info foo インストール済みのfooのすべての情報を表示
brew home HomebrewのWebサイトをデフォルトブラウザで表示
brew home foo fooのWebサイトをデフォルトブラウザで表示
brew update HomebrewのformulaeとHomebrew自体をアップデート
brew remove foo fooのアンインストール
brew create [url] ダウンロード可能なファイルのURLのformulaを生成して$BREW_EDITORか$EDITORで指定されているエディタで開く
brew create url-of-tarball --cache formulaを生成して、tarballをダウンロードする。md5をformulaテンプレートに追加する。
brew create --macports foo どのようにfooをインストールするか調べるために、MacPortsパッケージ検索ページでfooを検索する。
brew create --fink foo Finkで同様のことを行う。
brew edit foo formulaを$HOMEBREW_EDITORか$EDITORで開く
brew link foo fooのインストールされたファイルのHomebrew prefixシンボリックリンク作成する。(Homebrewでインストールすると自動的に行われる。DIYインストールを行った場合に有用。
brew unlink foo Homebrew prefixシンボリックリンクを削除する。
brew prune Homebrewprefixからデッドシンボリックリンクを削除する。
brew outdated 利用可能なアップデートバージョンが存在するformulaを表示する。新しいバージョンをインストールするにはbrew install fooを実行する。
brew upgrade 利用可能なアップデートバージョンが存在するformulaをすべてアップグレードする。
brew --config Homebrewのシステム設定を表示する
brew --prefix Howebrew prefixのパスを表示する。(普通は /usr/local)
brew --prefix (formula) インストールされたformulaのパスを表示する。
brew --cellar Homebrew Cellarのパスを表示する。(普通は /usr/local/Cellar)
brew --cache Homebrew キャッシュダウンロードのパスを表示する。(普通は ~/Library/Caches/Homebrew)
brew doctor インストールの一般的な問題をチェックする。
brew audit すべてのformulaeのコードとスタイルの問題を検査する。
brew cleanup foo インストールしたすべてもしくは特定のformulaeの古いバージョンをcellarから削除する。すべての場合はbrew cleanupを実行する。
http://w.koshigoe.jp/study/?%5Bsystem%5D%5Bosx%5D+Homebrew+%BB%C8%A4%A4%CA%FD%A5%E1%A5%E2
Mac デ Homebrew ノススメ
Pouring について記載を追加
imagemagickのコンバートでPDFを分割しようとした。
takuya@air:~/Desktop$ convert  200905_015-088.pdf -resize 480 dest*.png
sh: gs: command not found
convert: Postscript delegate failed `200905_015-088.pdf': No such file or directory @ error/pdf.c/ReadPDFImage/664.
convert: missing an image filename `dest*.png' @ error/convert.c/ConvertImageCommand/3015.
そういうことなので、Macは準備に色々必要らしい。
brew install gs
これで準備完了。Windowsでも、Cygwinでもghost script/ Imagemagick をインストールしたら準備完了です。magick の convert はgs のラッパーとして動くみたい
Macには最初からImageMagickが用意されてる。なのでgsを入れたら動く
Linux 等の場合には ImageMagickコマンドとGhostScriptを用意する。
windowsの場合
choco install imagemagick ghostscript
convert gunmaweb4-110213050747-phpapp02.pdf dst.png
便利なソフトウェアを探すより、それらがベースにしているソフトウェアのコマンドから使用方法を覚えてメモっておく方が便利。
何より、コマンドなのでメモ帳に貼るだけで終わり。コマンドがあれば再現できる。画像手順書?何それおいしいの?
imagemagick の代わりに GraphicsMagickでもいい
オレオレRubyGems配布サイトを作りたいと思った。
Route477さんがやってる。→http://route477.net/d/?date=20100720
gem install geminabox
設定ファイル config.ru を書いて「rackup config.ru -p 9292」とかするとgemサーバが起動する。
require "rubygems"
require "geminabox"
Geminabox.data = "/var/geminabox-data" # …or wherever
run Geminabox
geminaboxはWeb UIを持ってるので、ブラウザでlocalhost:9292とかを開くと管理画面が表示される。ここからgemファイルをアップロードすることができる。
rackup -o 192.168.95.210 -p 8888 config.ru
または、手動で追加
$ gem inabox foo-0.1.2.gem
としてもいい (初回は「Host:」と聞かれるので、「http://localhost:9292/」などと入力する)。
自前のgemサーバを追加する(この情報は~/.gemrcに保存されている)。
$ gem sources -a http://localhost:9292/
Sinatraはえらい。
takuya@debian00:~$ rackup config.ru -h
Usage: rackup [ruby options] [rack options] [rackup config]

Ruby options:
  -e, --eval LINE          evaluate a LINE of code
  -d, --debug              set debugging flags (set $DEBUG to true)
  -w, --warn               turn warnings on for your script
  -I, --include PATH       specify $LOAD_PATH (may be used more than once)
  -r, --require LIBRARY    require the library, before executing your script

Rack options:
  -s, --server SERVER      serve using SERVER (webrick/mongrel)
  -o, --host HOST          listen on HOST (default: 0.0.0.0)
  -p, --port PORT          use PORT (default: 9292)
  -O NAME[=VALUE]          pass VALUE to the server as option NAME. If no VALUE, sets it to true. Run '/usr/bin/rackup -s SERVER -h' to get a list of options for SERVER
      --option
  -E, --env ENVIRONMENT    use ENVIRONMENT for defaults (default: development)
  -D, --daemonize          run daemonized in the background
  -P, --pid FILE           file to store PID (default: rack.pid)

Common options:
  -h, -?, --help           Show this message
      --version            Show version
URIのエンコードをコマンドにしていつでも呼べるようにしておくと便利だと思う。
v8エンジンが確実だと思ったけれど、V8はコマンドプロンプトから呼んでもShebangで呼べない。
 1 #!/usr/bin/env ruby
 2
 3 require 'uri'
 4 str = ARGV.join if ARGV.size > 0
 5 str = STDIN.read unless ARGV.size > 0
 6 puts URI.encode(str)
 1 #!/usr/bin/env ruby
 2
 3 require 'uri'
 4 str = ARGV.join if ARGV.size > 0
 5 str = STDIN.read unless ARGV.size > 0
 6 puts URI.encode(str)
これで便利になる。